Creating Email Templates with AI Integration
This guide walks you through creating dynamic email templates that seamlessly combine AI-generated content with your own personalized touch. By following these steps, you can build tailored outbound messaging that aligns with your strategy while allowing AI to customize content for each prospect.
Step-by-Step Instructions
1
Access the Template Page
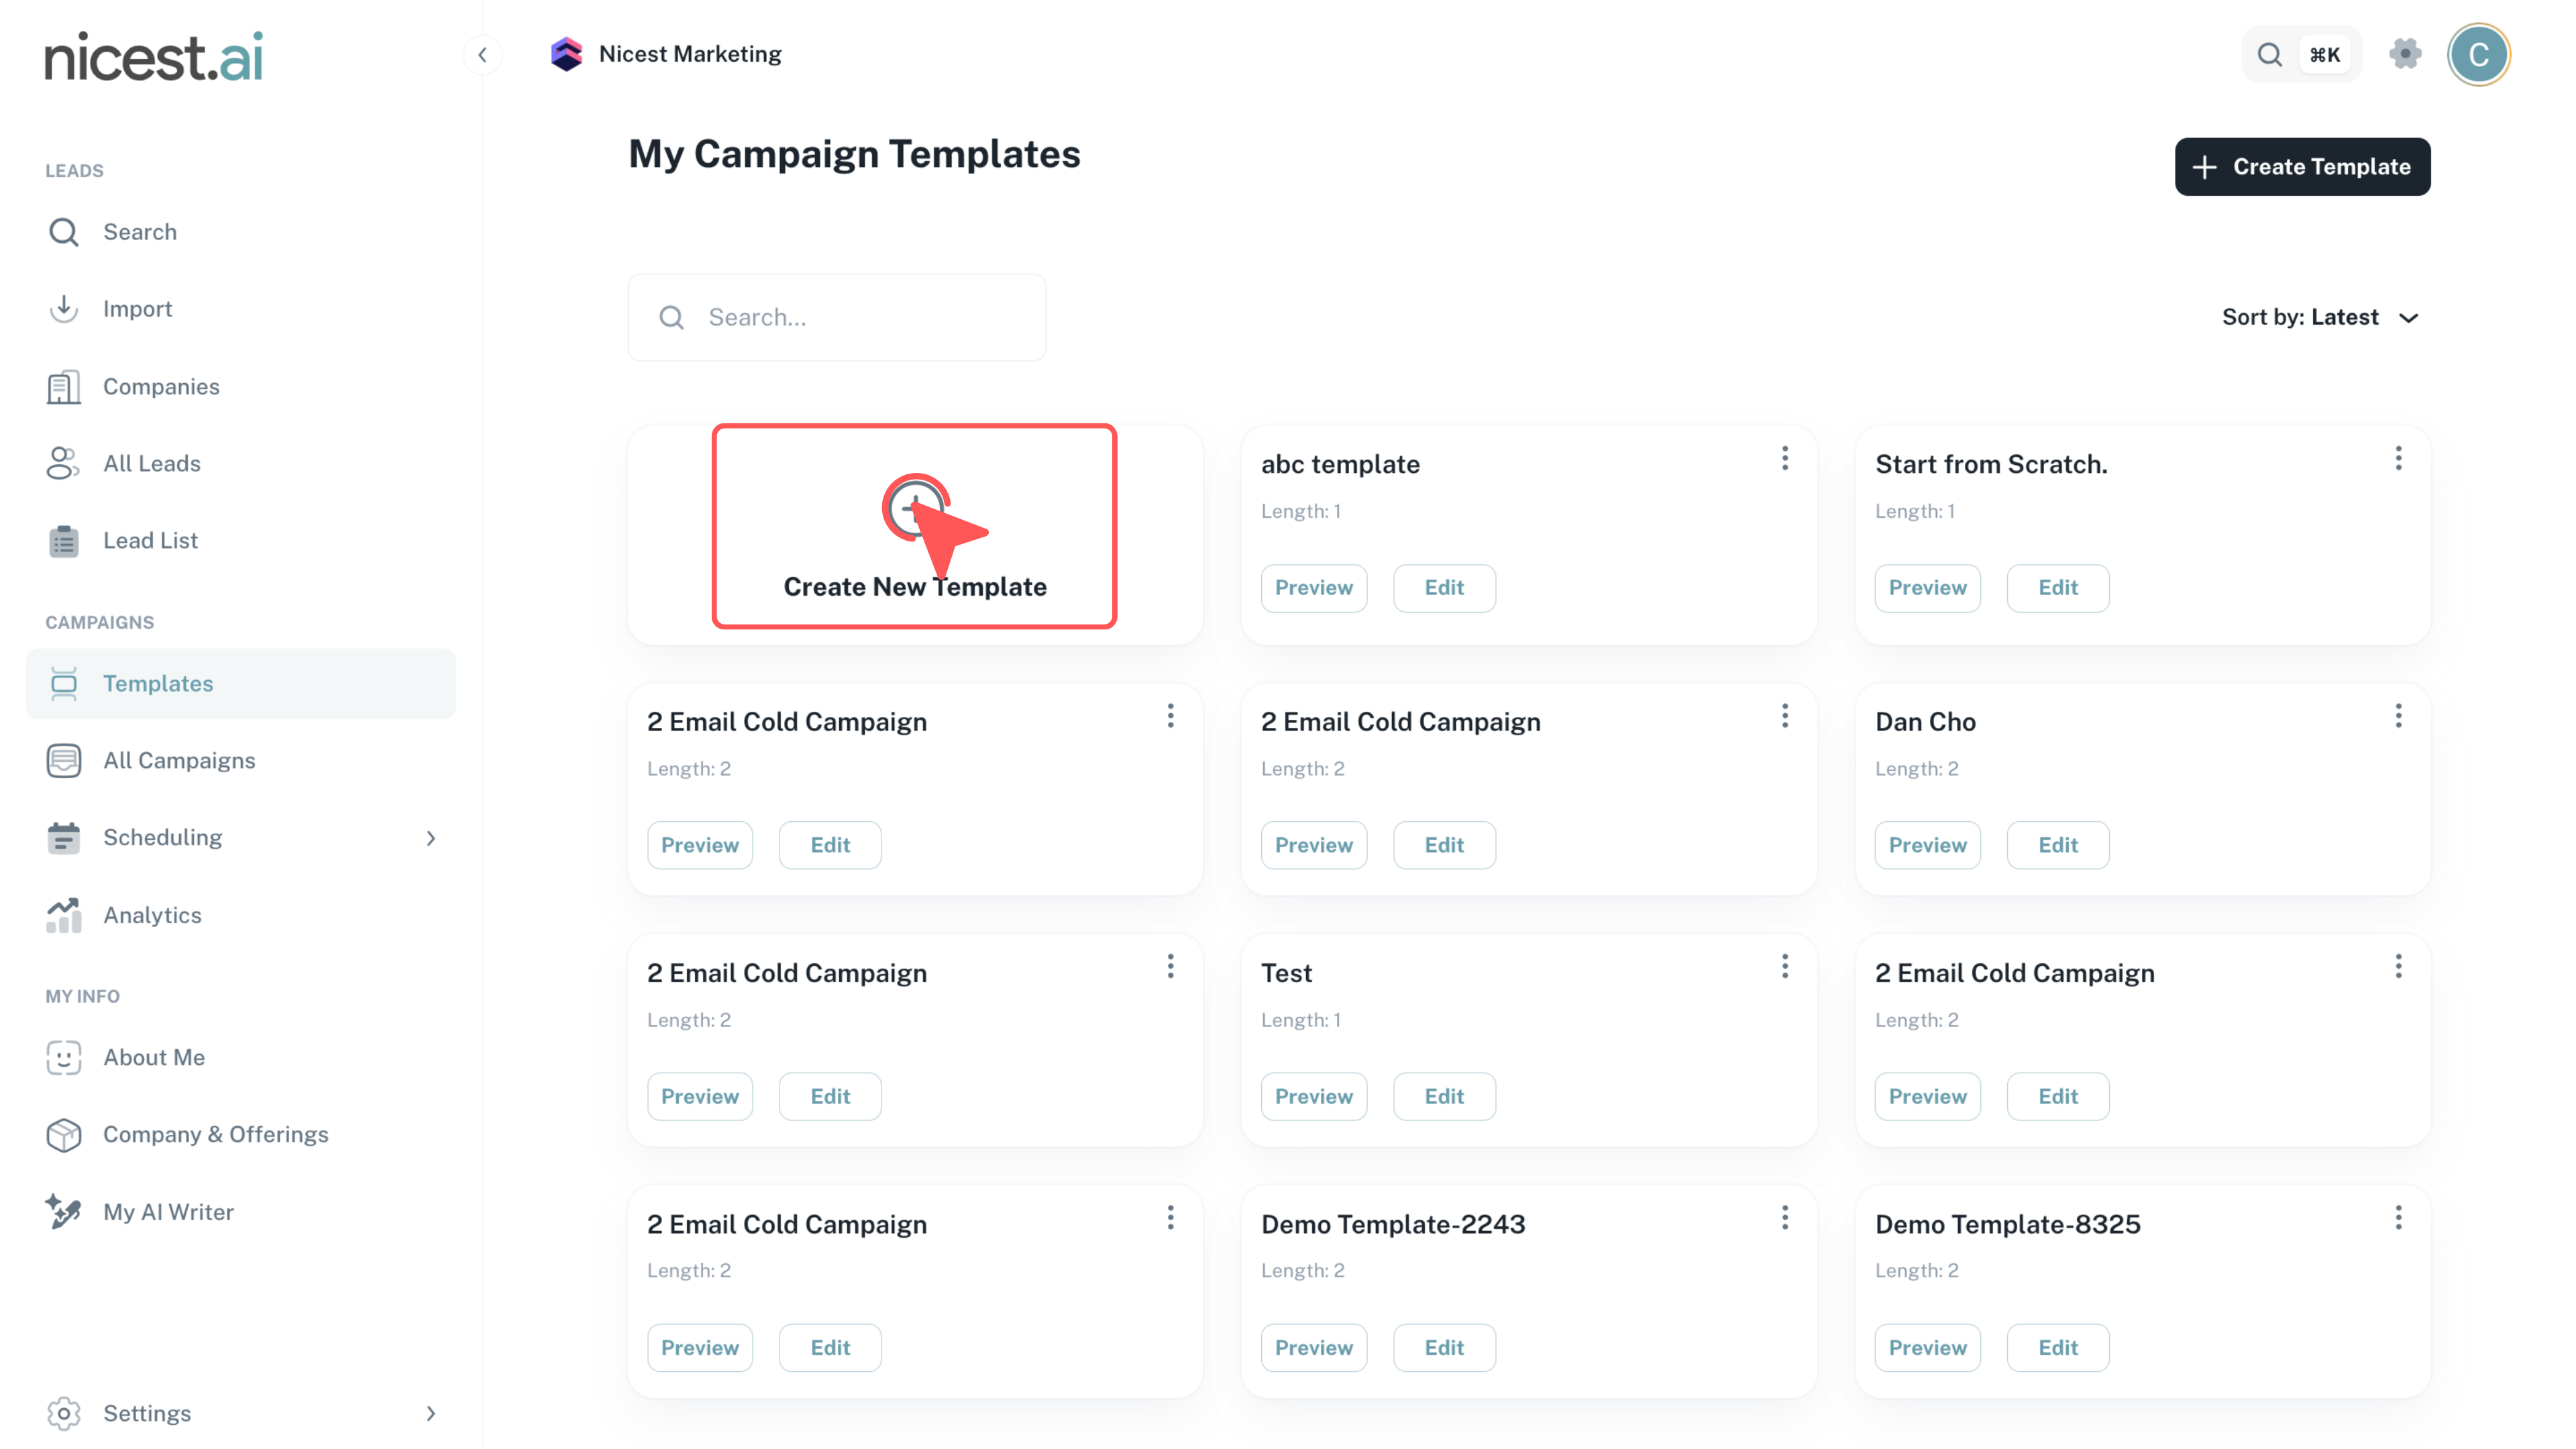
Sign into your account and navigate to the Template page. Click on Create New Template to begin your email template creation process.
- Ensure you are logged into your account with the correct credentials.
- Locate the Template page to start building your email templates.
Tip
- Bookmark the Template page for quicker future access.
2
Template Setup
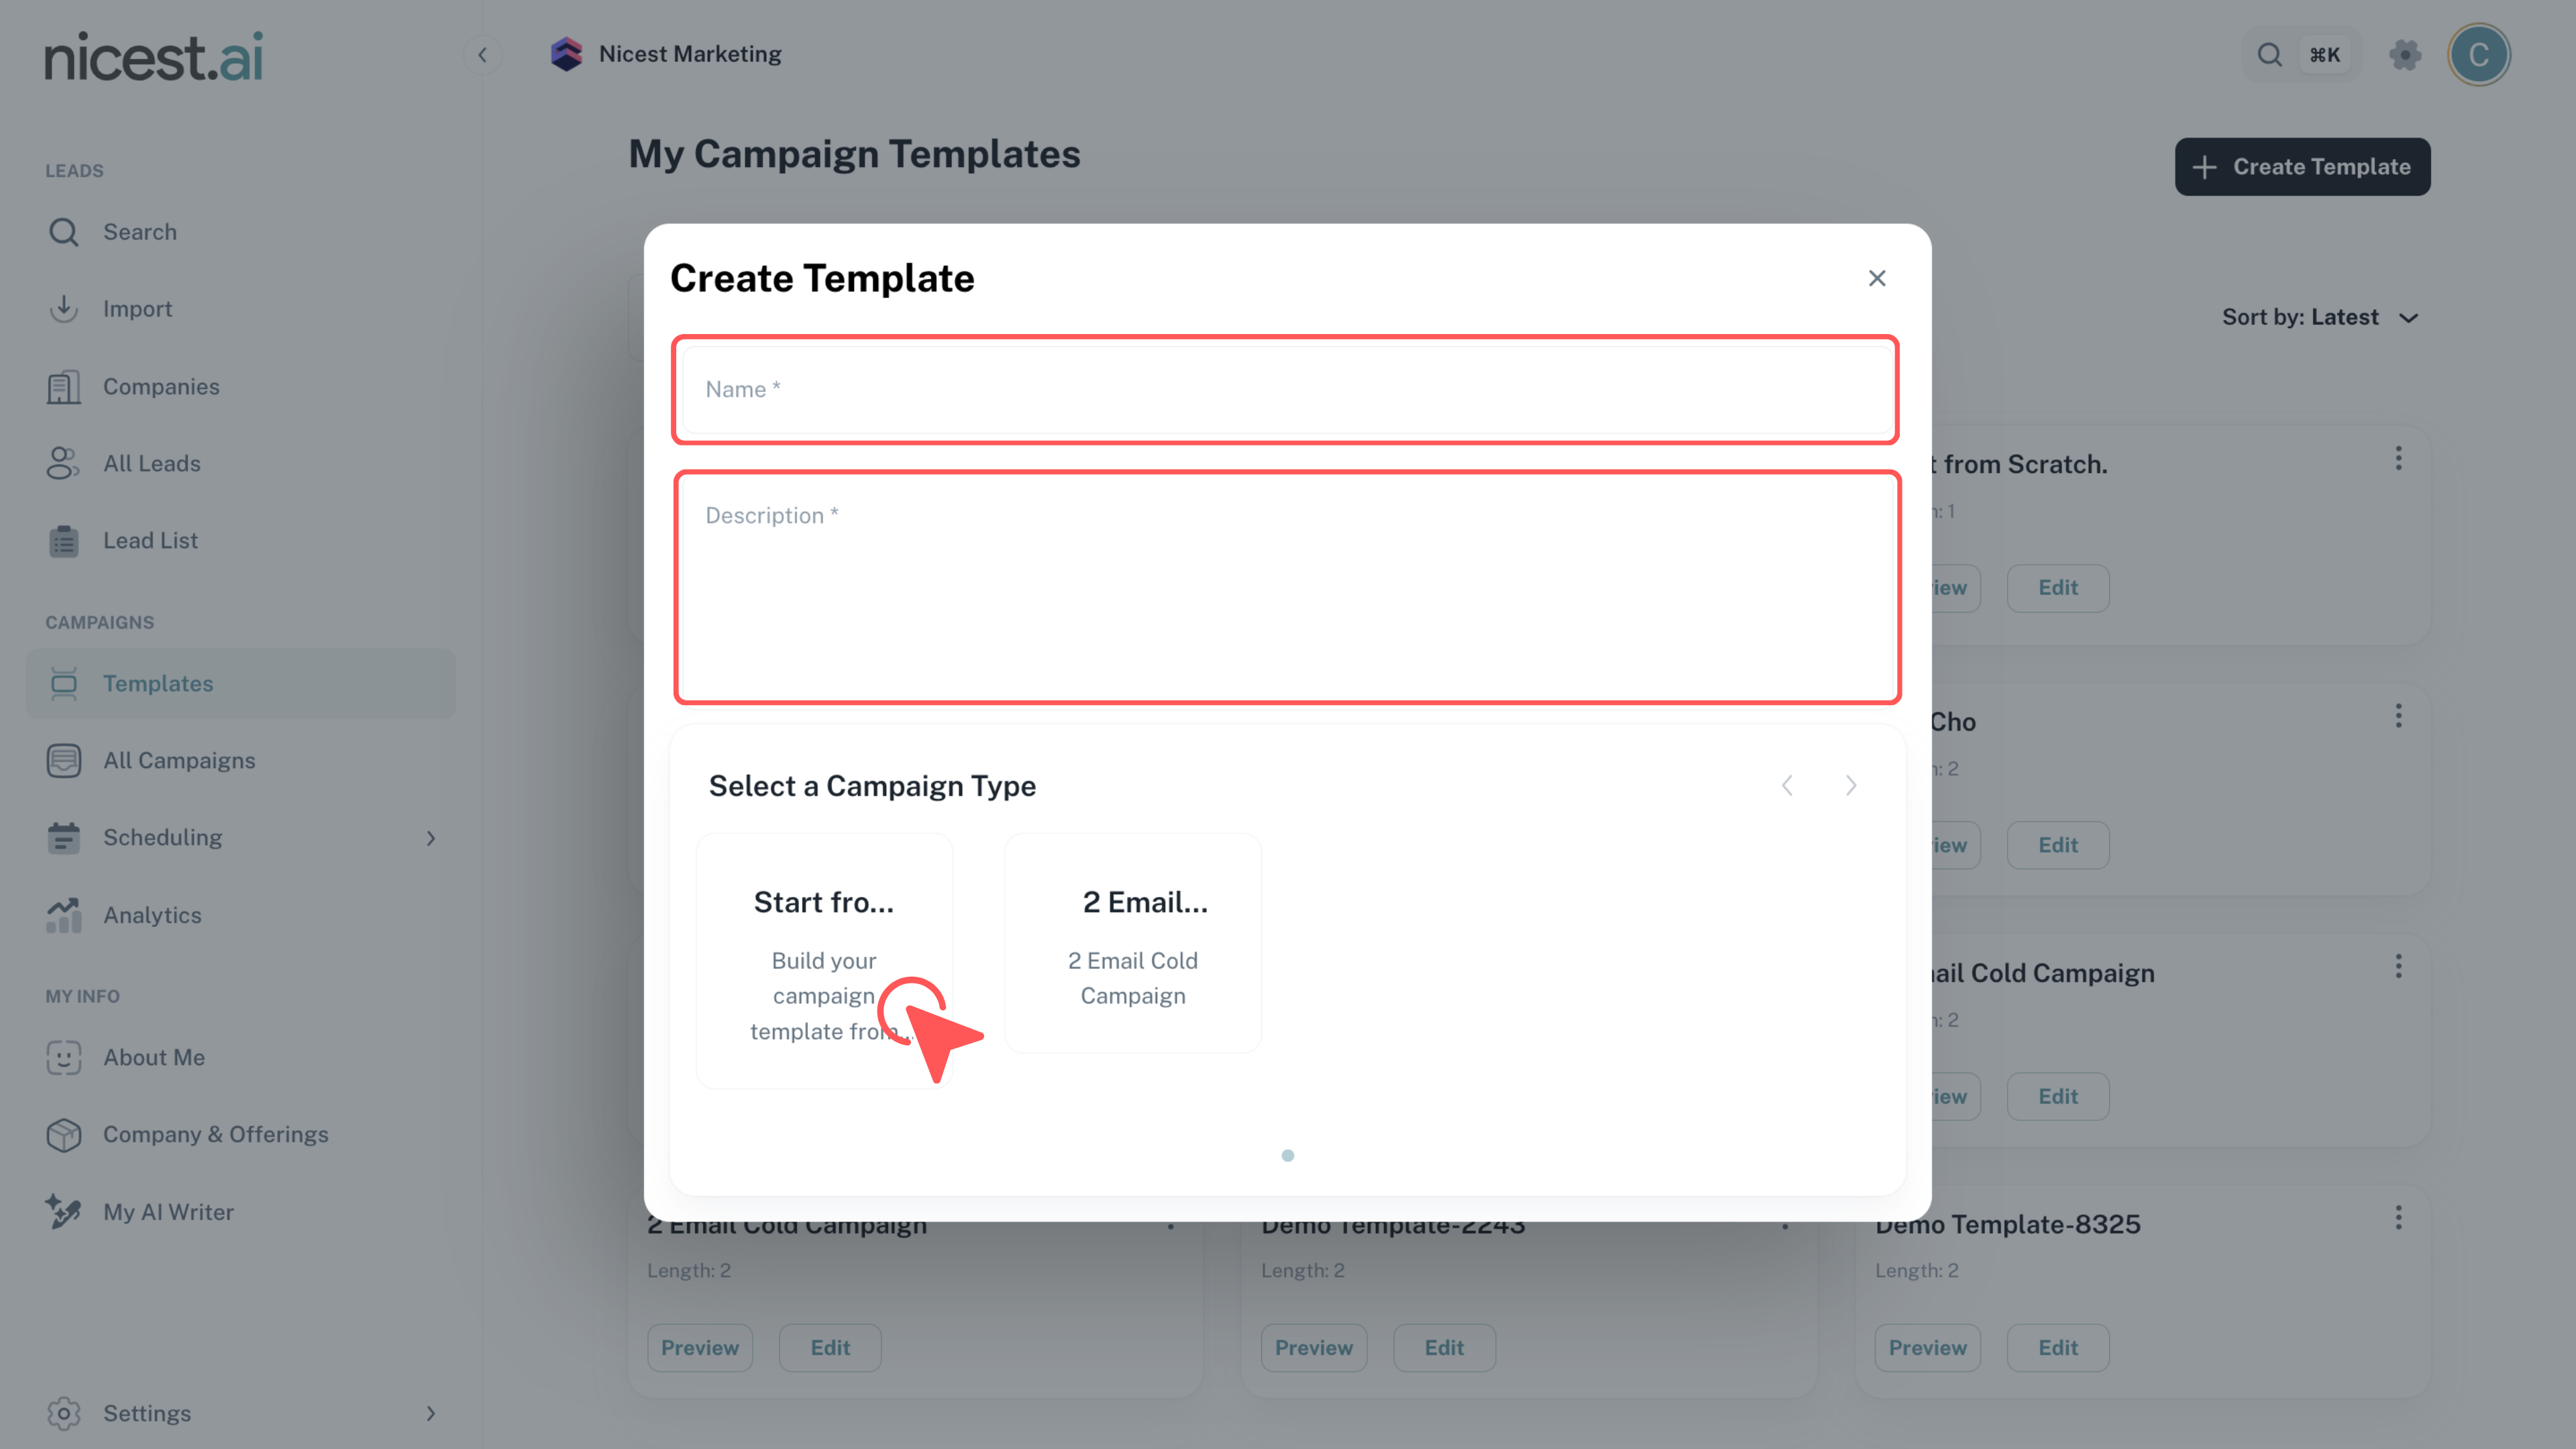
Define your email template by giving it a unique name, providing a brief description of its purpose, and selecting the appropriate campaign type. Choosing to start from scratch will present you with a blank template screen.
- Name your template in a way that reflects its intended use.
- Add a description to outline the template’s objective clearly.
- Select a campaign type that fits your outbound strategy.
3
Build Your Outbound Campaign on the Canvas
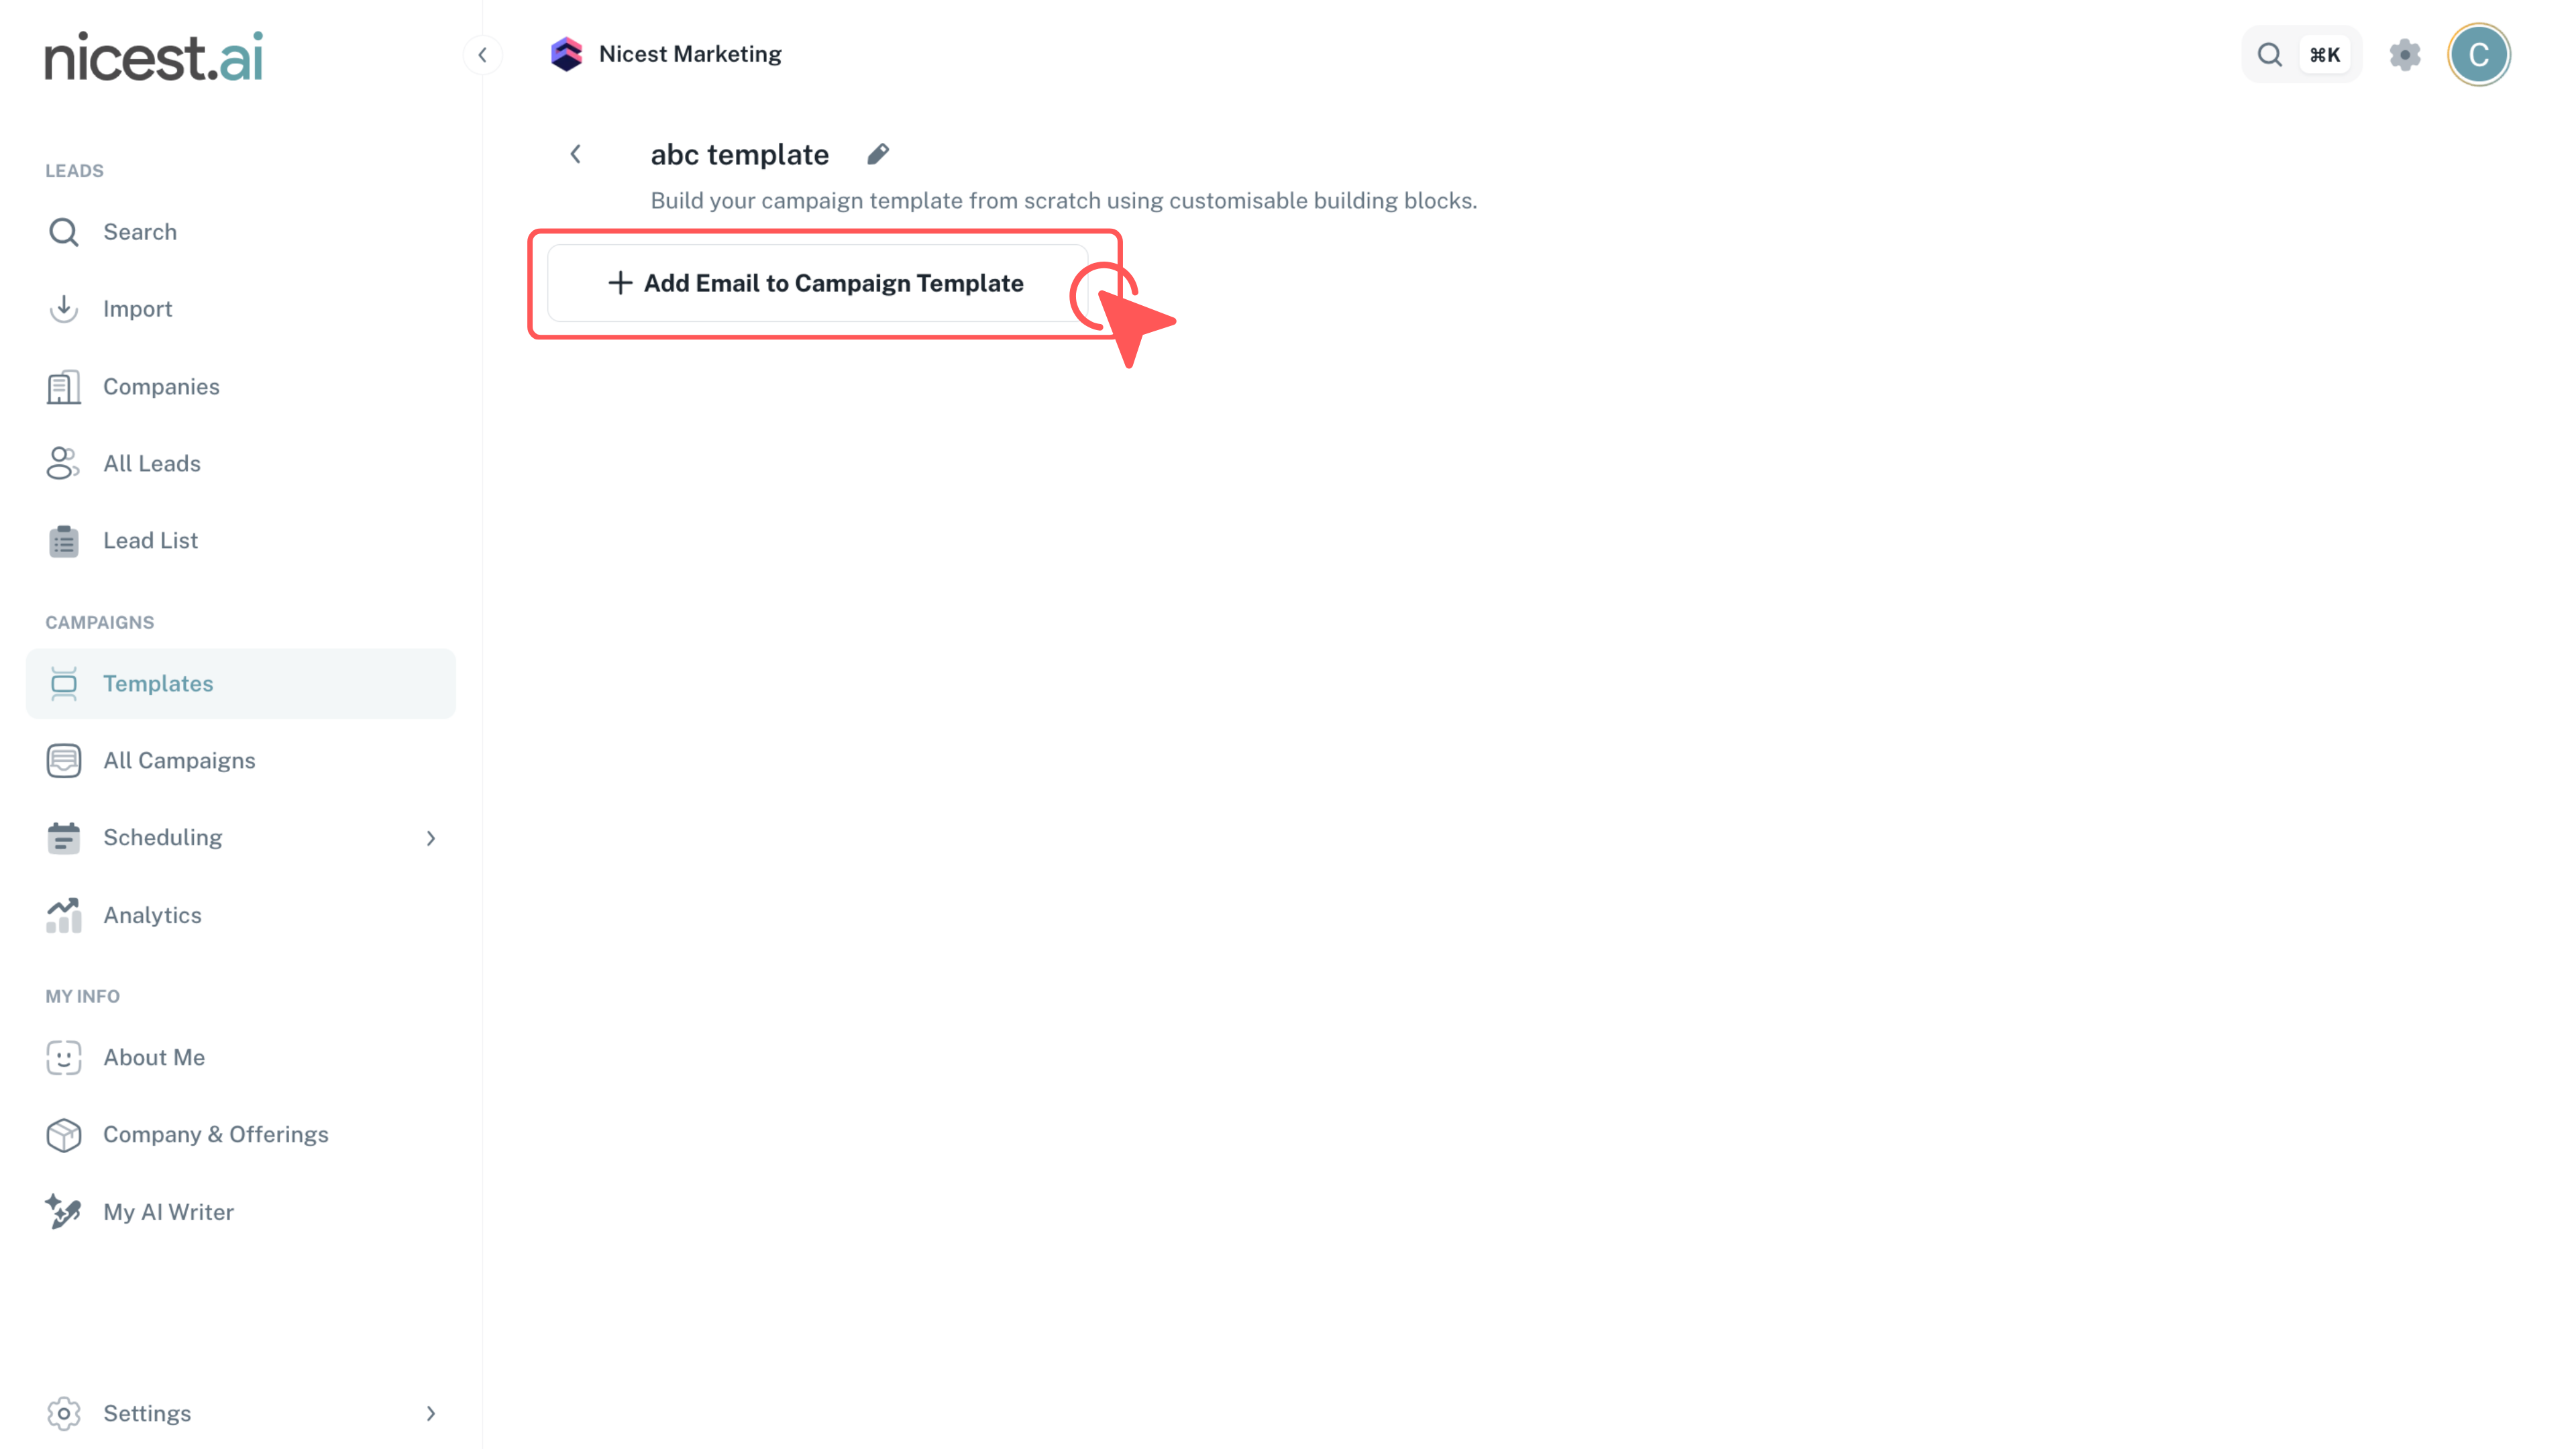
After setting up your template, you will be greeted with a canvas where you can design your outbound sequence. Begin by adding a new email to your sequence—label it (e.g., 'Email 1') and press Enter to continue.
- Design your outbound sequence by adding and labeling emails.
- Keep the sequence organized by clearly numbering or naming each email.
4
Insert Content Blocks
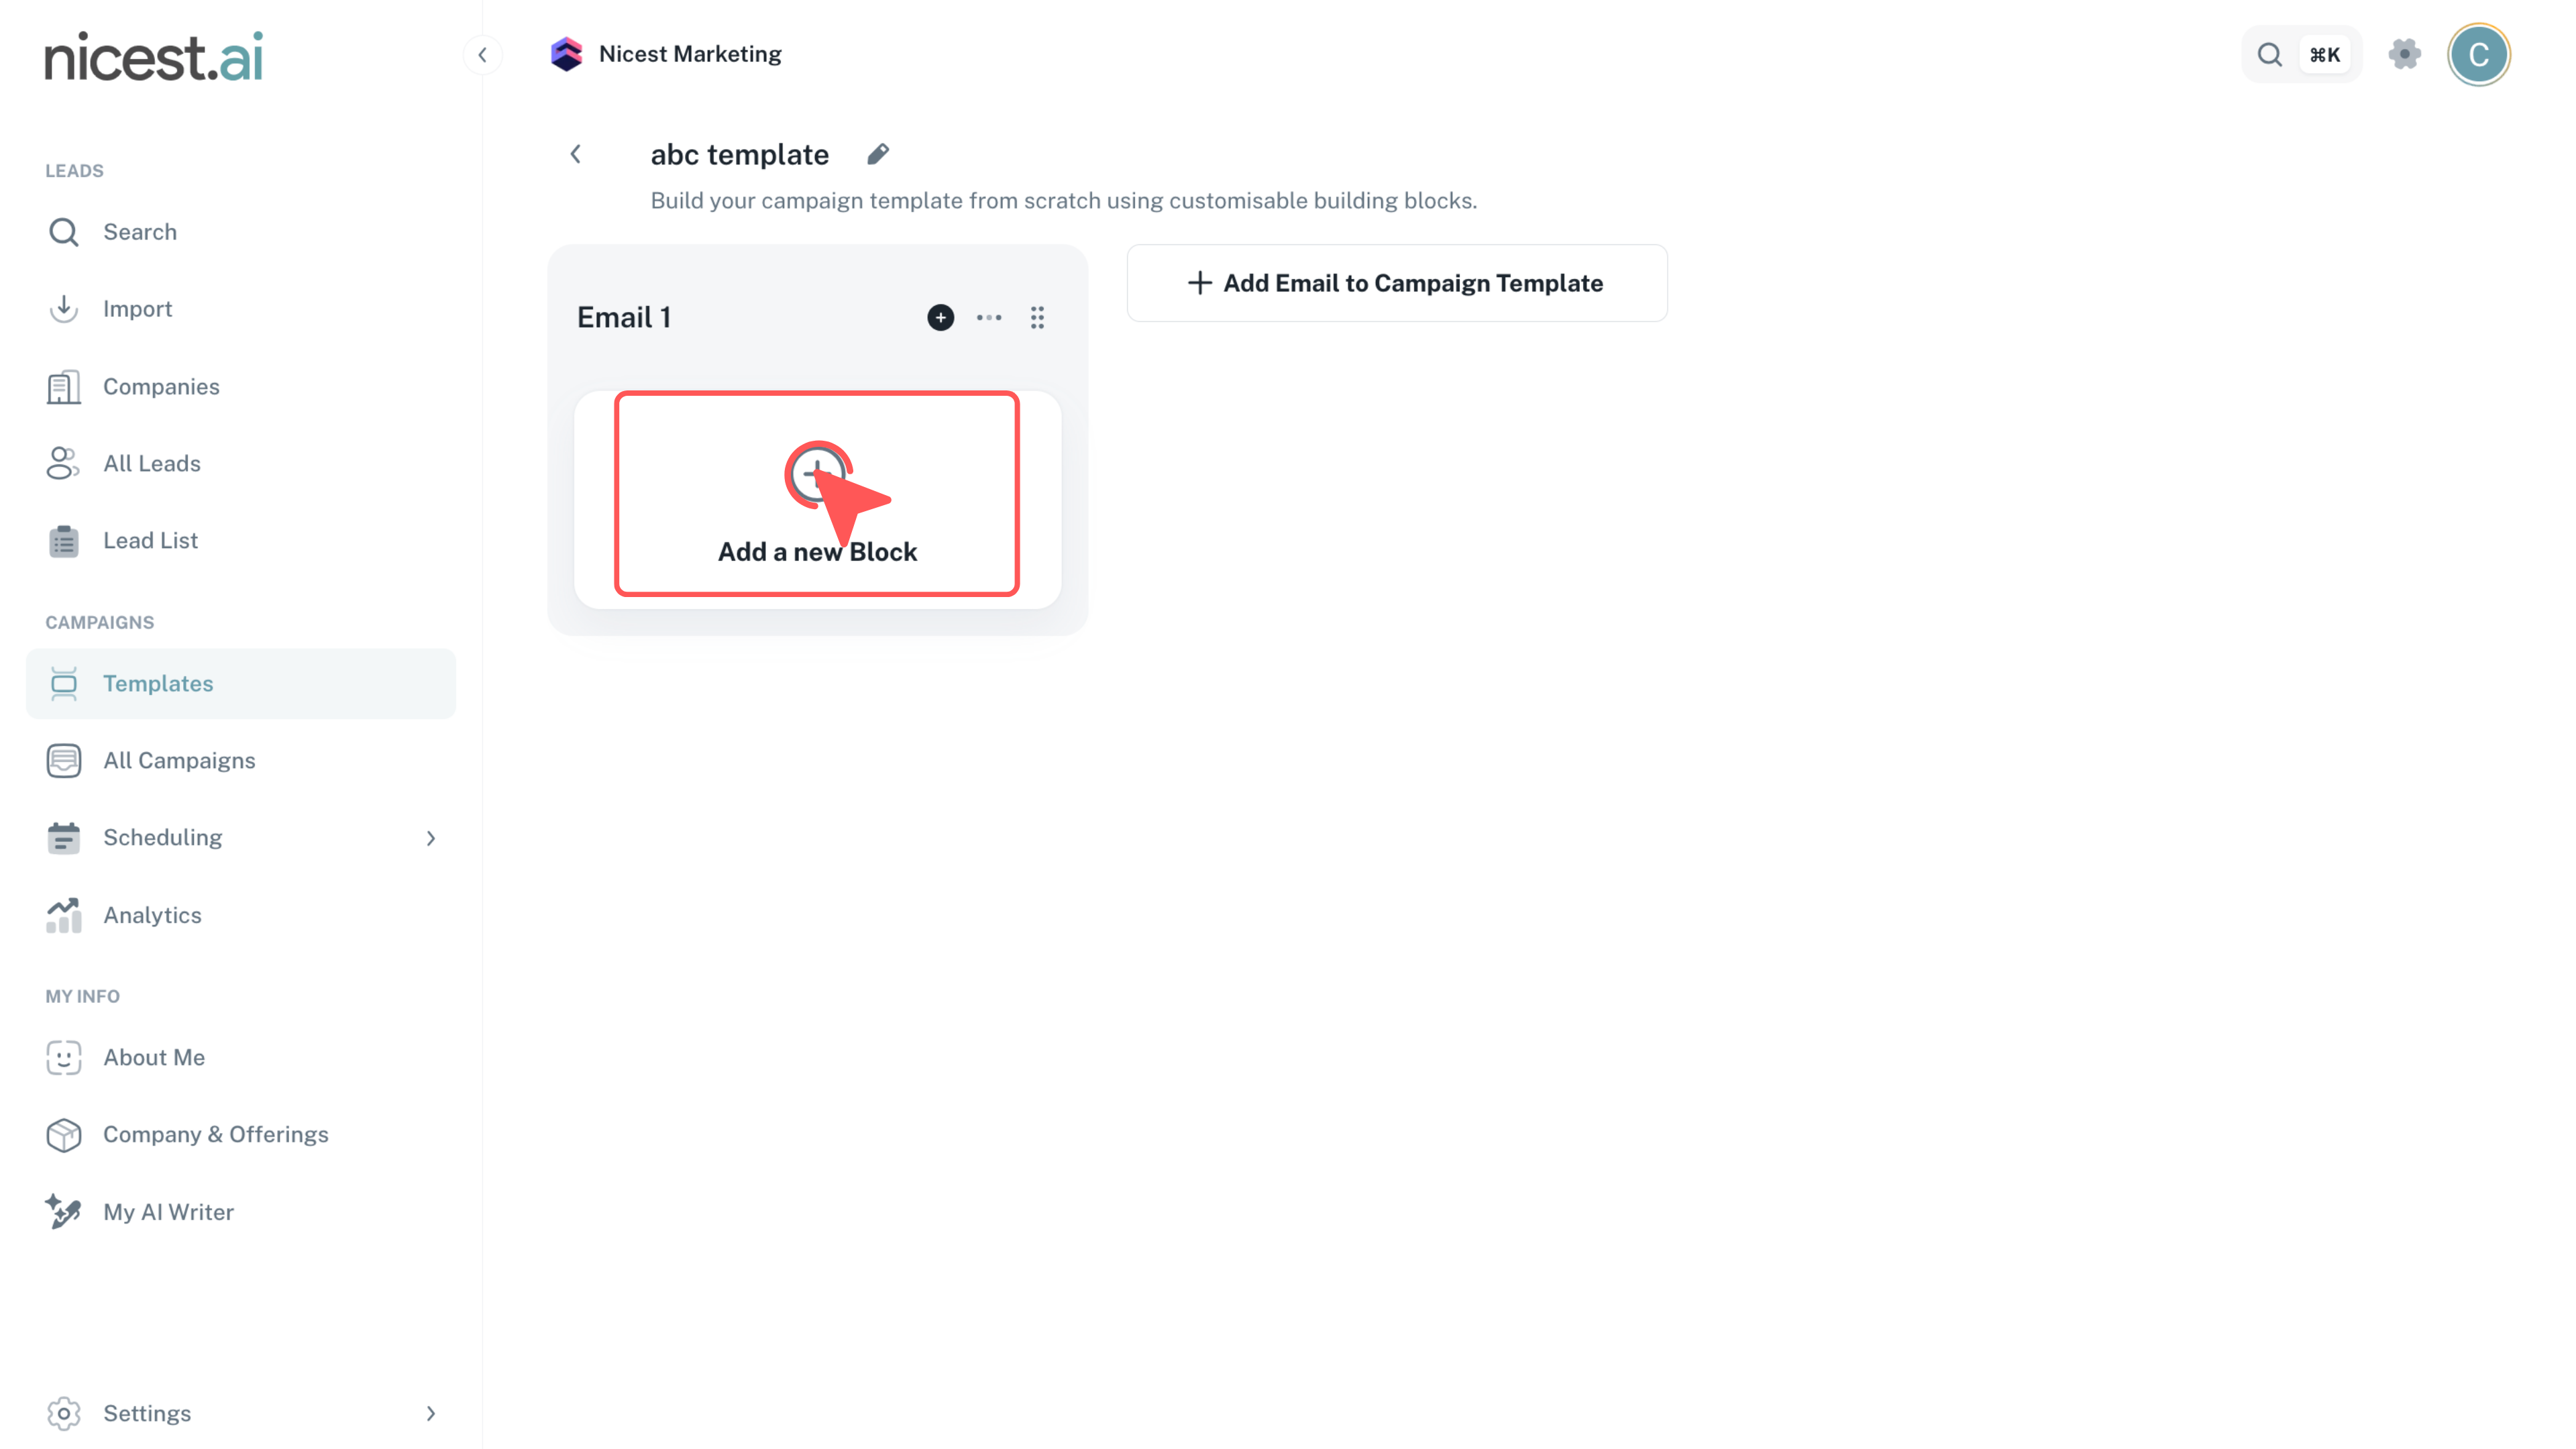
Enhance your email by inserting content blocks. You have two options: a Plain Text Block for static content and an AI Block to generate 1-2 sentence custom paragraphs tailored to each prospect.
- Plain Text Block: Edit to include any static text you wish to maintain, such as a closing phrase.
- AI Block: Use this block to automatically generate personalized content for introductions, inquiries, or warm closings.
Tip
- Combine both blocks to keep your unique style while leveraging AI for personalization.
5
Utilize Variables
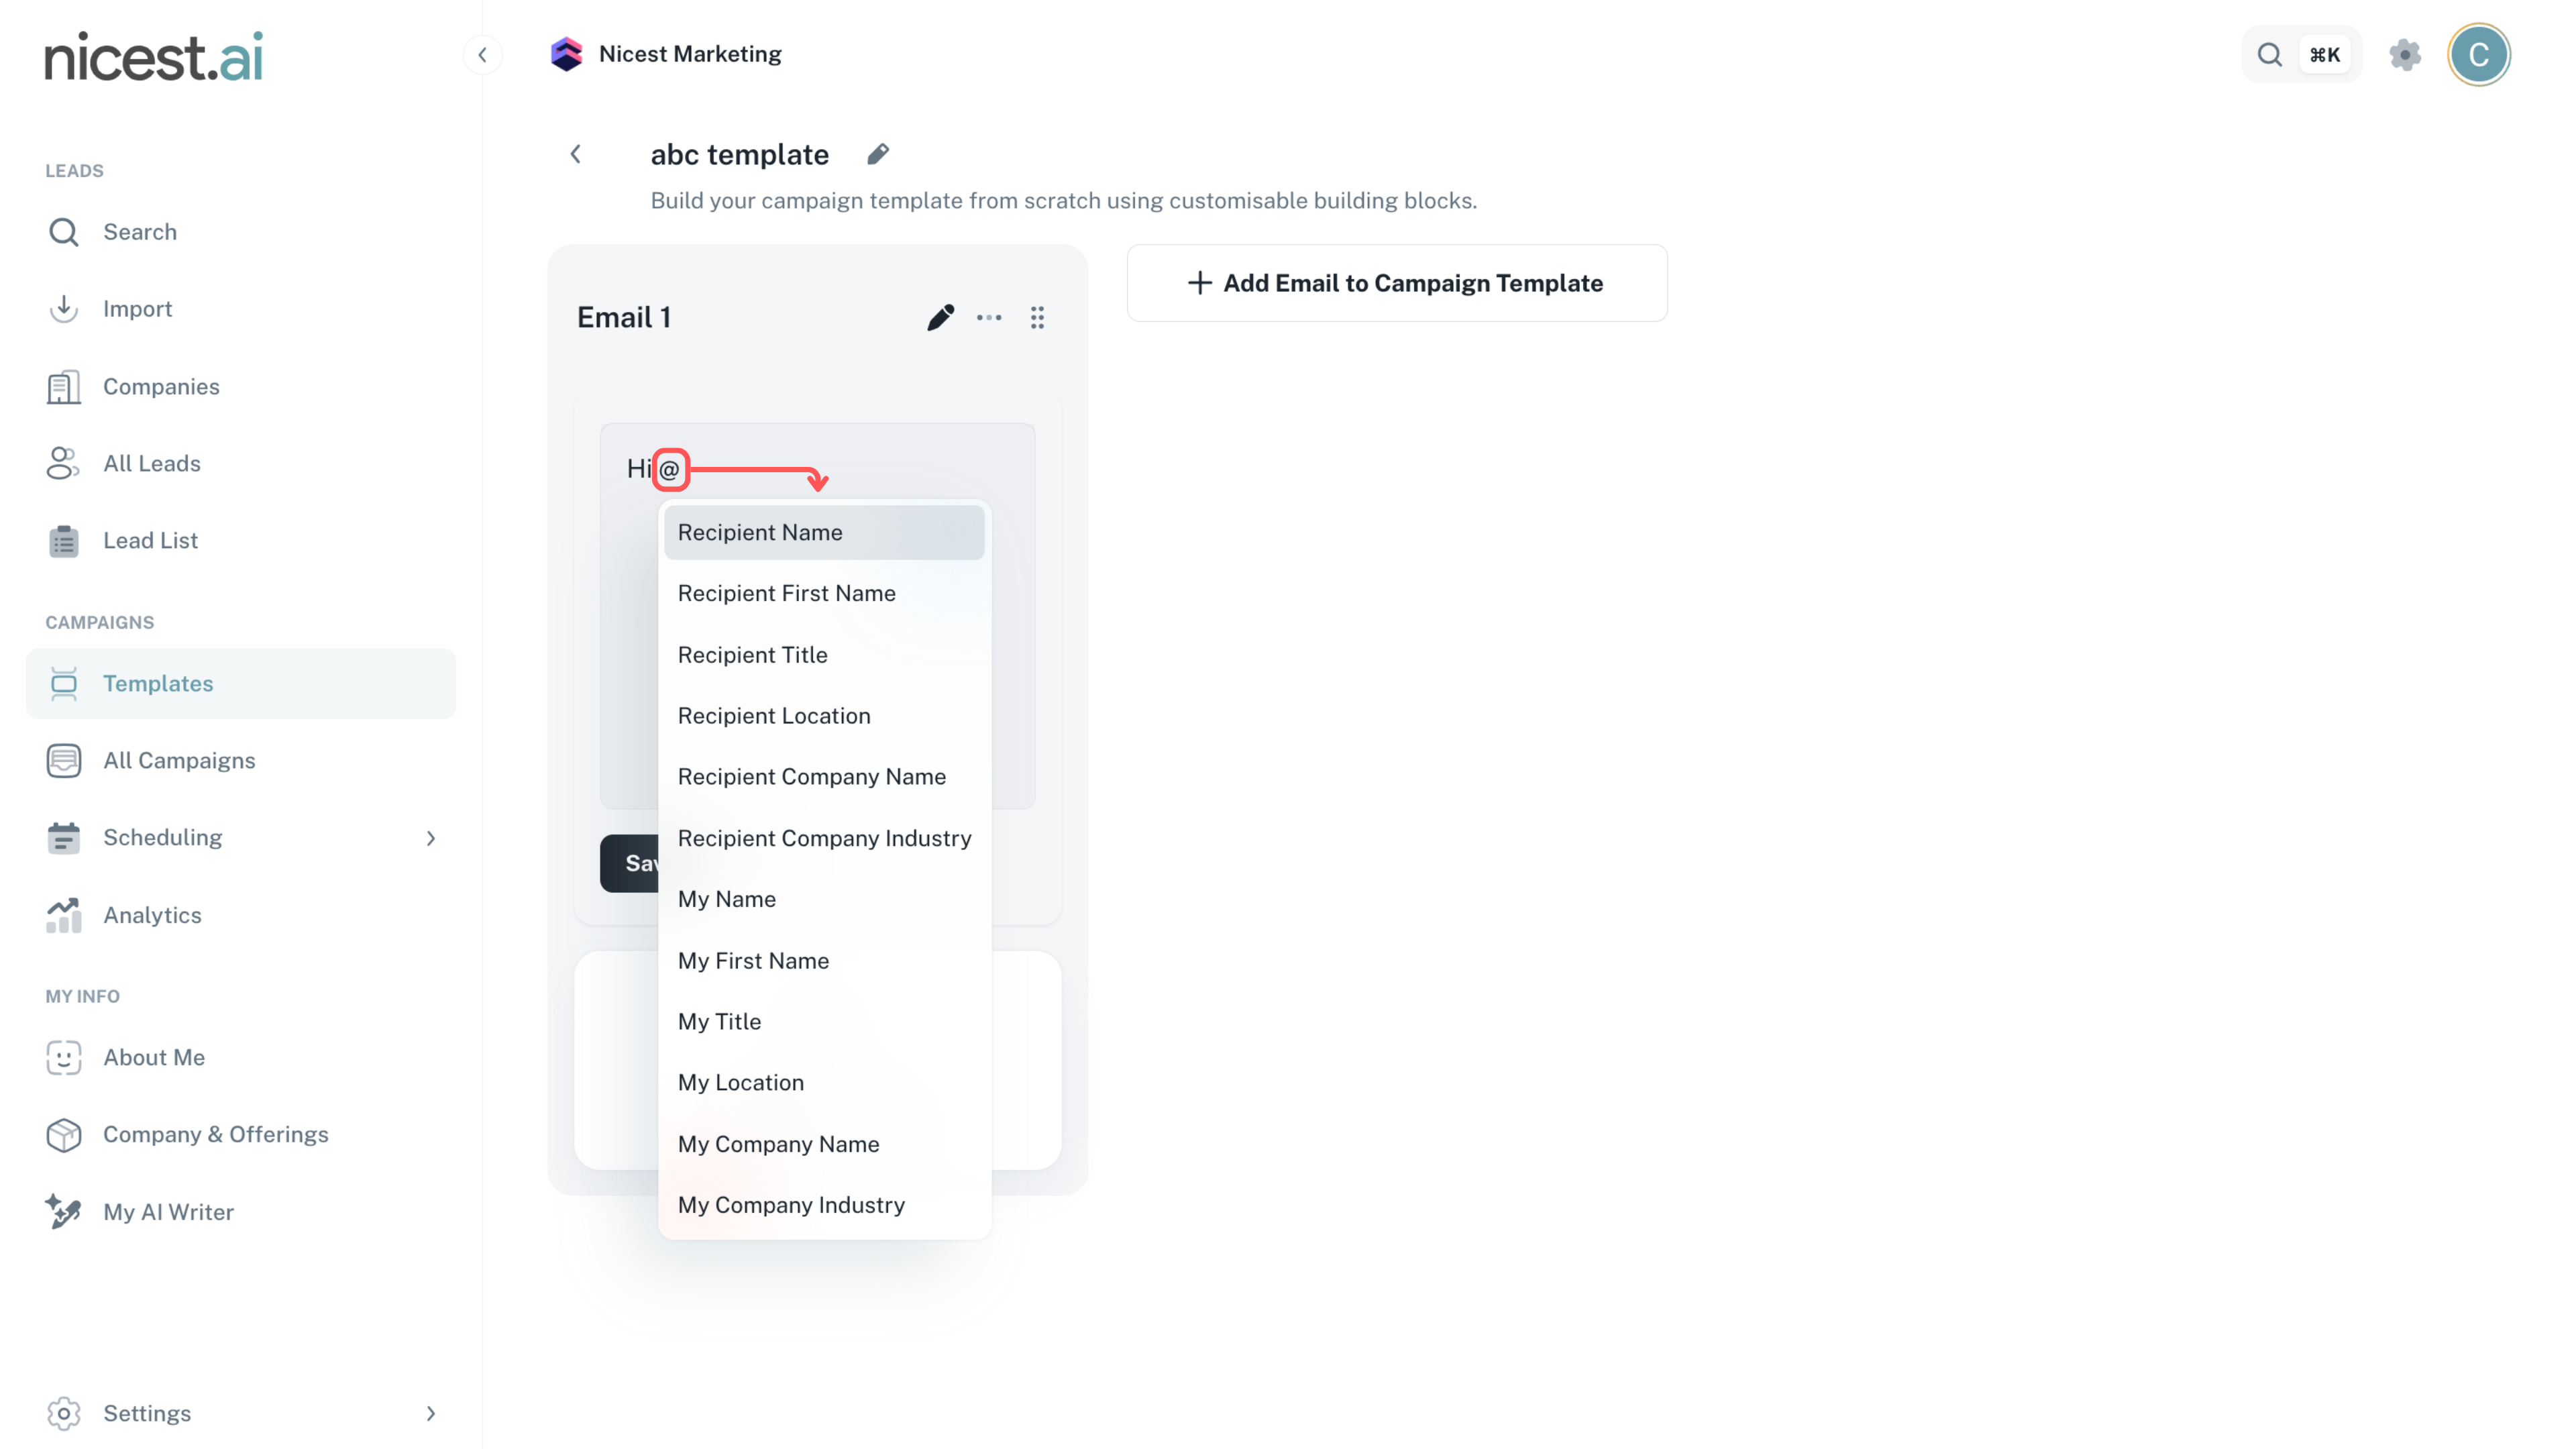
While editing a plain text block, press the @ key to insert dynamic placeholders such as your name, your recipient's name, or your recipient's company name. These variables act as mail merge placeholders, ensuring each email is personalized.
- Quickly insert variables to personalize your emails.
- Utilize dynamic placeholders to replace static text with prospect-specific information.
Example
- Type @recipient to automatically insert the recipient's name.
6
Customize Your Sequence
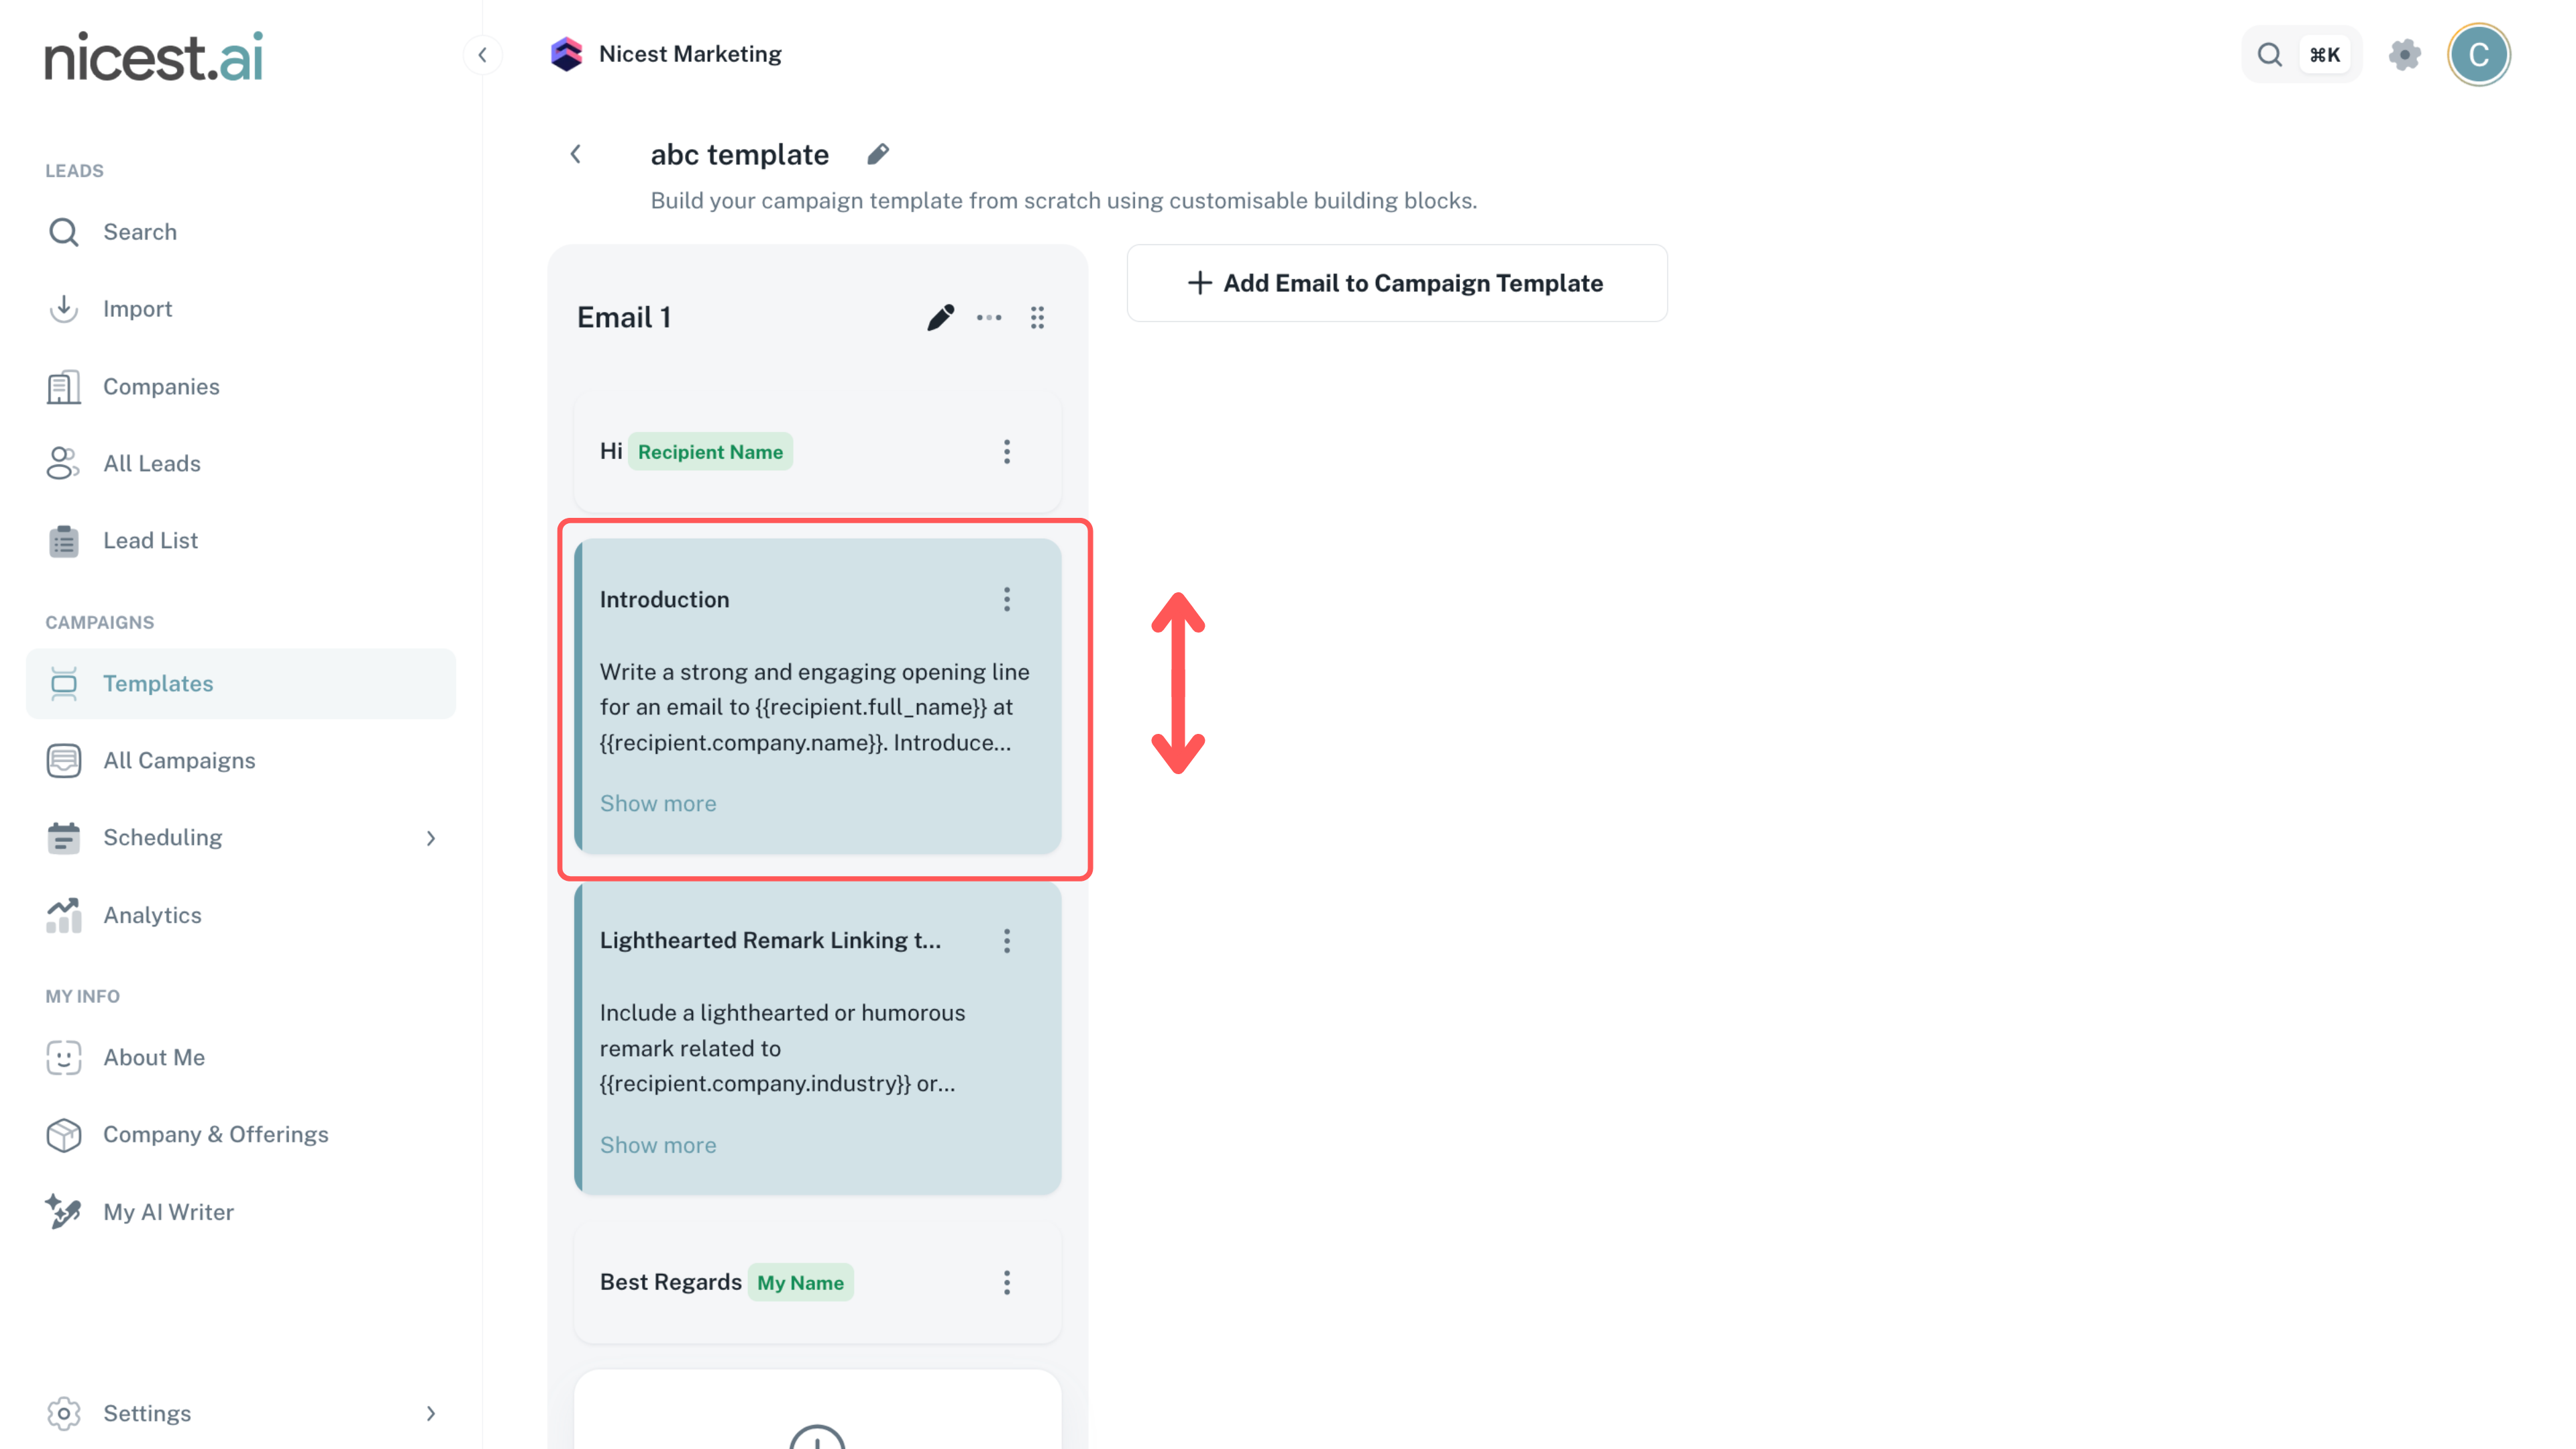
Enhance your outbound campaign by adding multiple emails and rearranging content blocks using the intuitive drag-and-drop functionality.
- Add additional emails to build a comprehensive multi-email sequence.
- Reorder content blocks and emails by simply dragging them to your desired position.